Best Product Photography Setup: A Step-by-Step Guide
Product photography is an essential aspect of marketing and e-commerce, enabling potential customers to get a clear and attractive view of products before making a purchase. While it might seem daunting, achieving professional-quality product photos can be done with a simple setup. In this guide, I’ll walk you through my process of product photography using just one light source, and I’ll show you how this straightforward approach can yield outstanding results.
Equipment and Setup
Product: Vaseline cream
Background: White backdrop
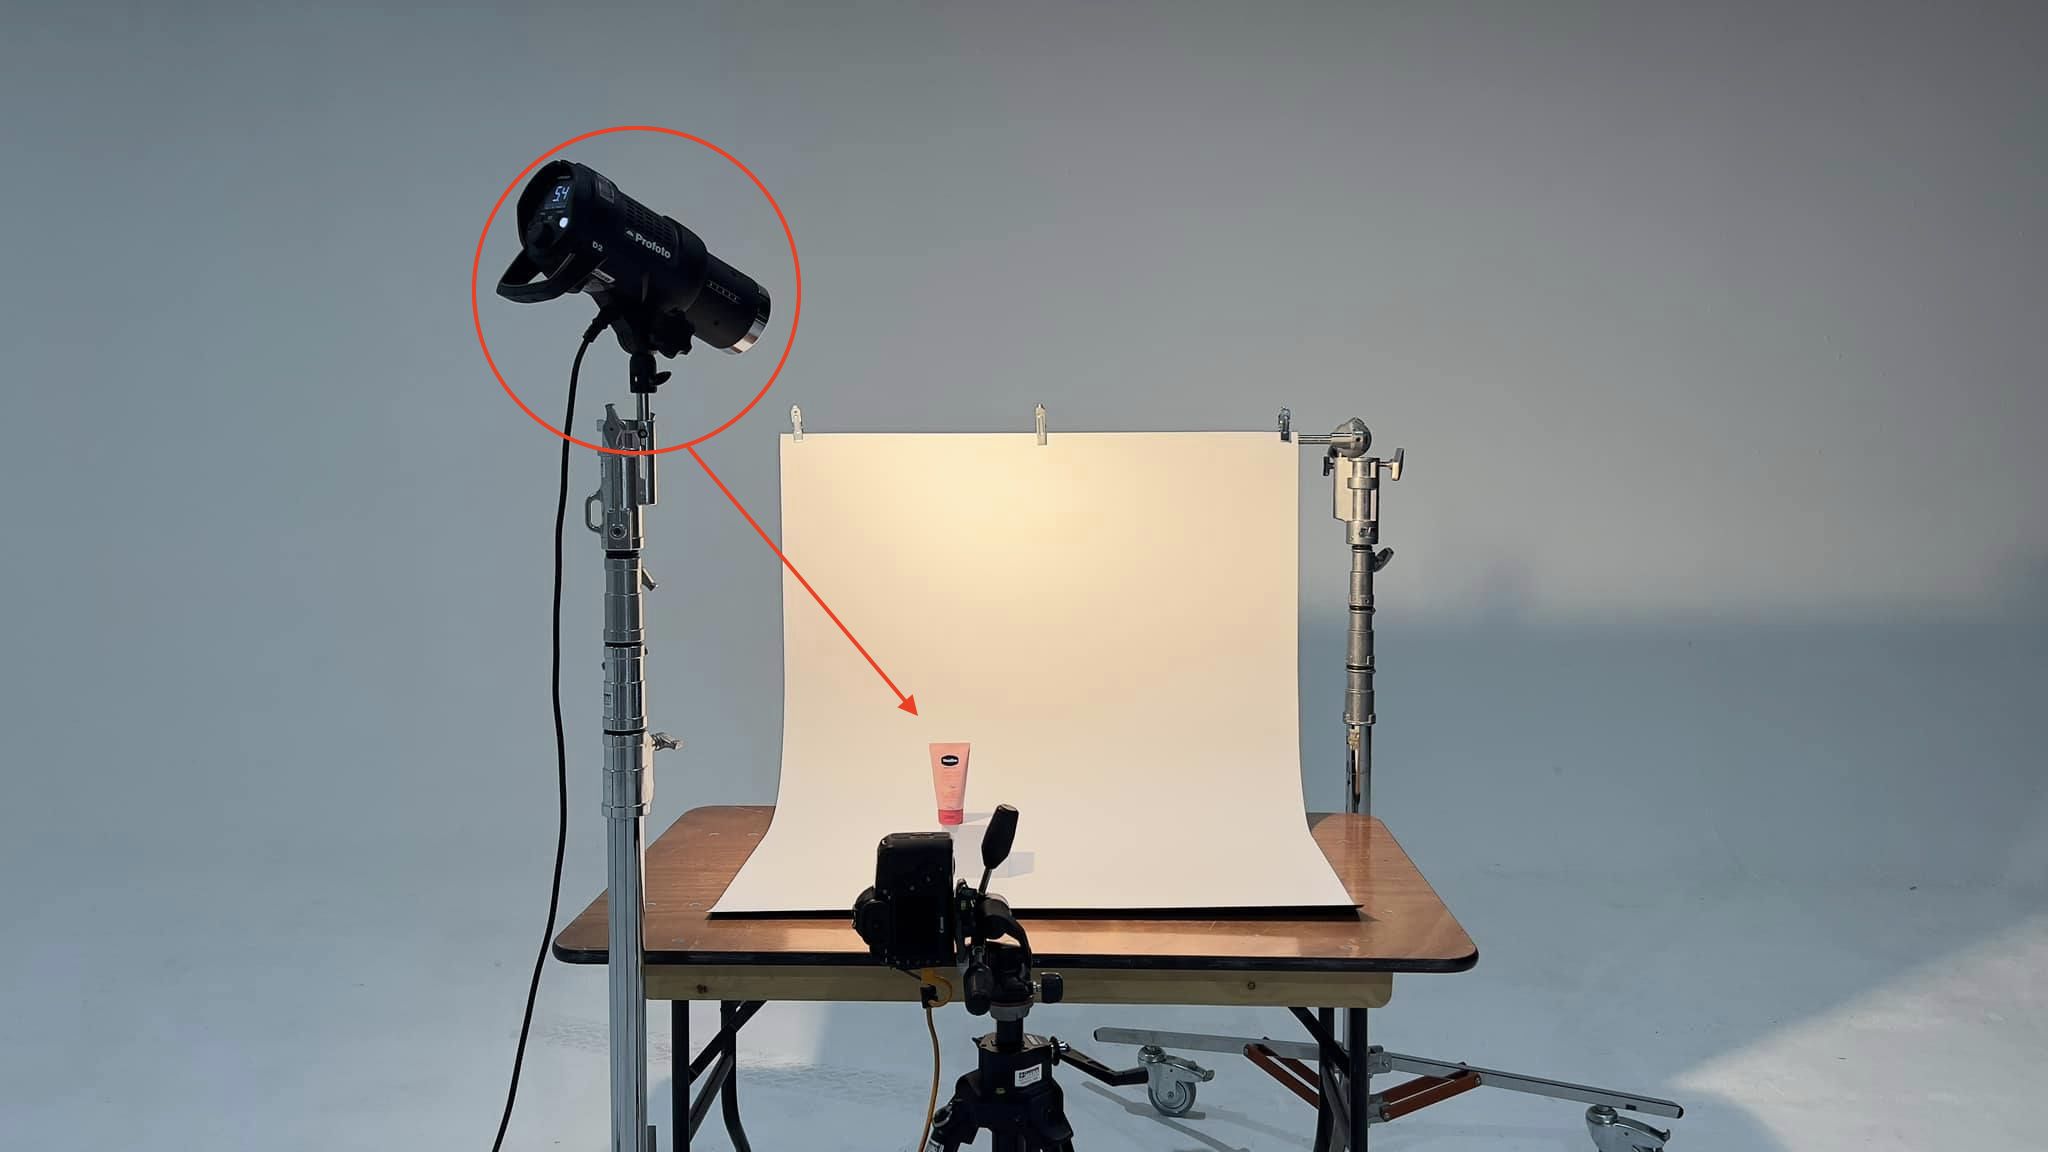
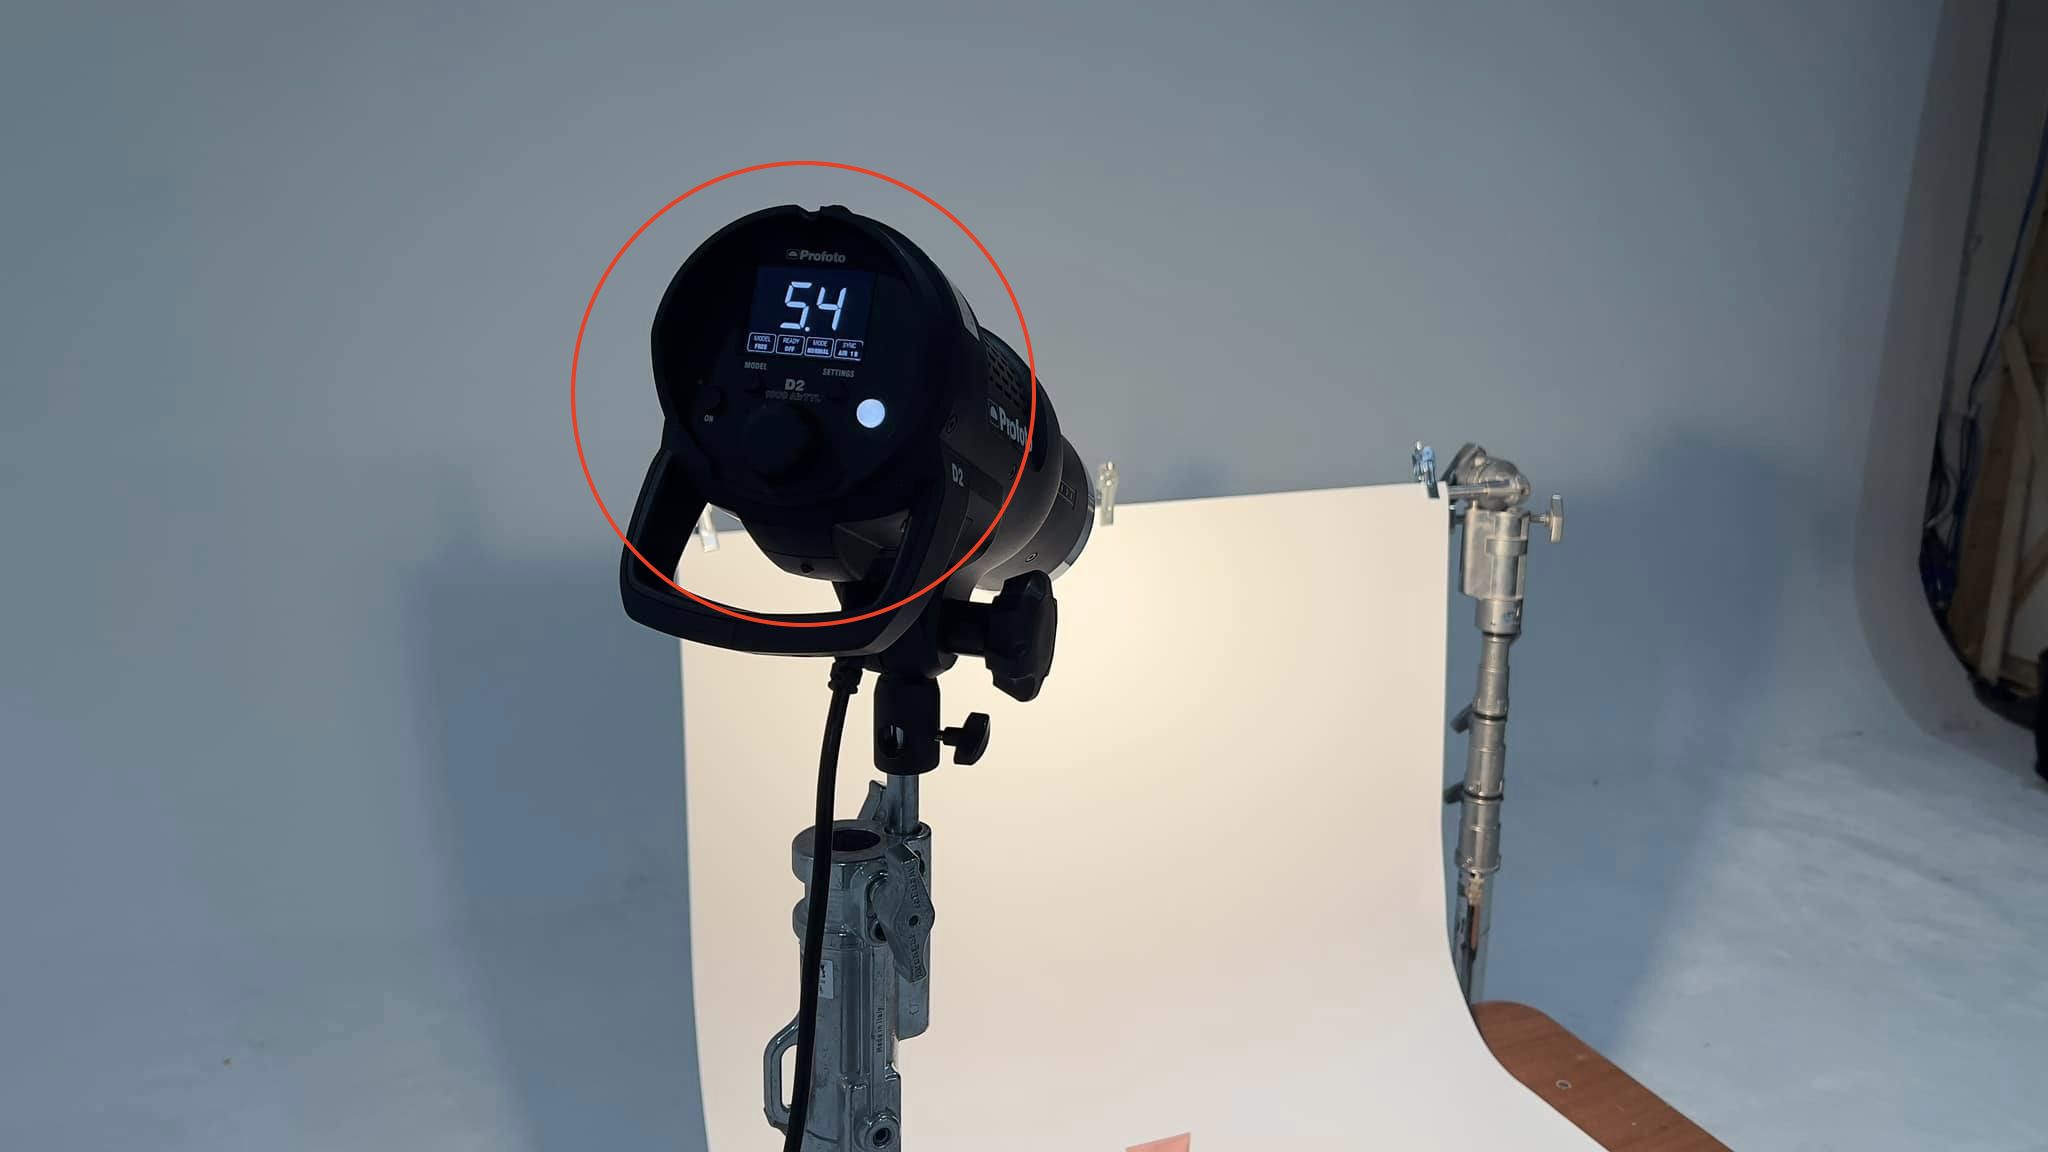
Lighting: Profoto D2 1000W light with bare bulb
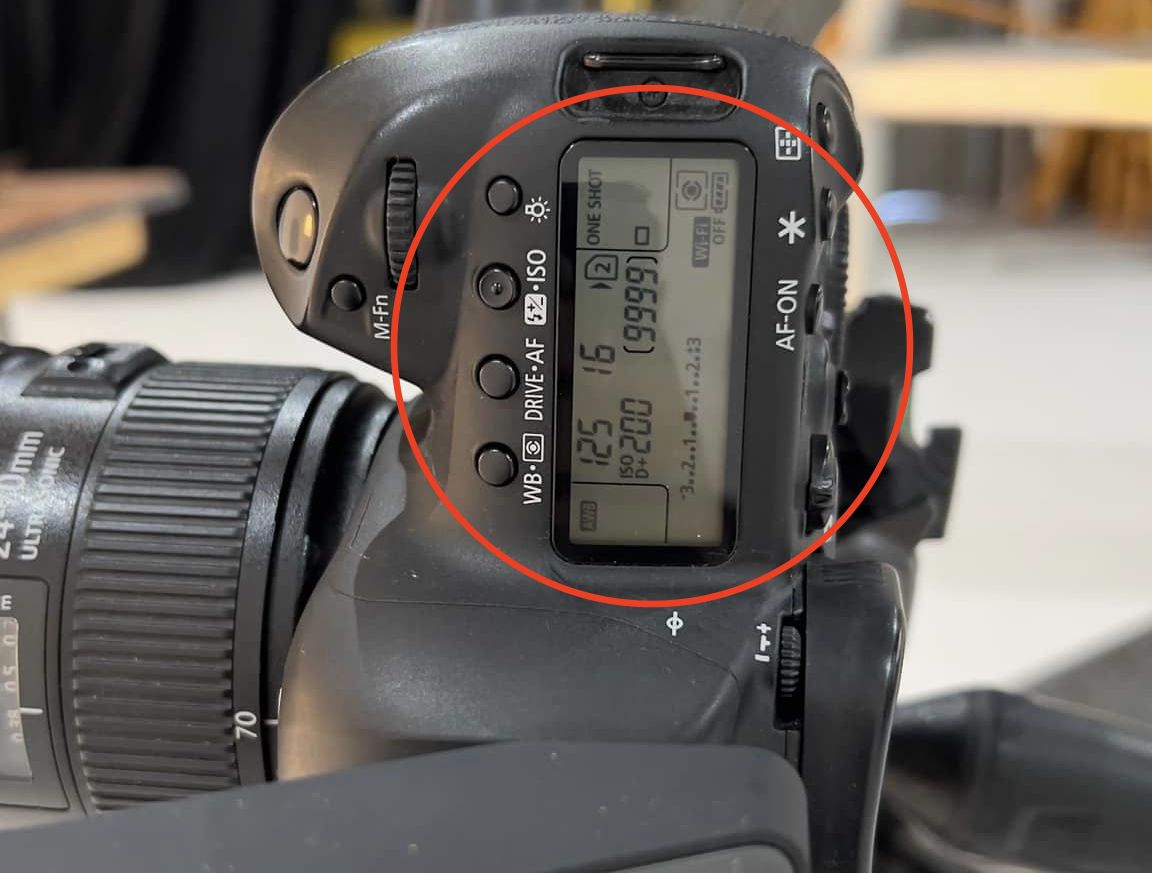
Camera: Canon 5D Mark IV
Lens: Canon 24-70mm f/2.8
Settings: ISO 200, f/16, shutter speed 1/125
Distance between product and background: 1 foot
Light setting: 5.4
Step-by-Step Guide
Step 1: Setting Up the Background
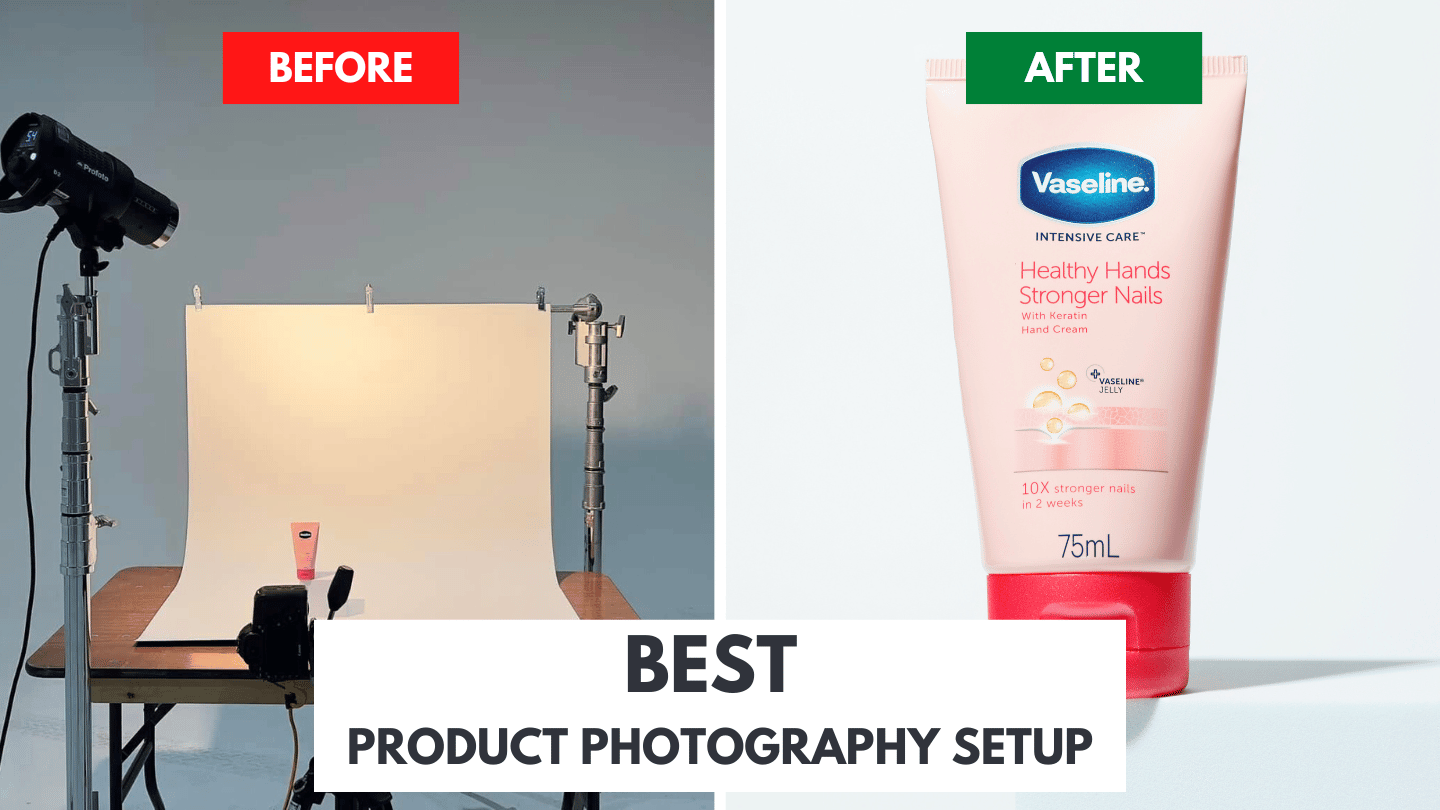
To start, I placed a white backdrop to create a clean and distraction-free environment. The white background not only helps the product stand out but also ensures that any shadows are soft and minimal. I positioned the backdrop one foot behind the product to prevent any unwanted shadows from interfering with the final image.
Best Product Photography Setup Step 1
Step 2: Positioning the Product
Next, I placed the Vaseline cream on a white cube. This choice of a white cube serves two purposes: it maintains the clean, professional look and provides a sturdy platform that elevates the product slightly, giving it prominence in the frame.
Step 3: Setting Up the Light
For the lighting, I used a Profoto D2 1000W light with a bare bulb. A bare bulb setup provides a broad and even distribution of light, which is crucial for product photography. I positioned the light at an angle to the product to create a soft shadow that adds depth without overpowering the image. The light was set to a power level of 5.4, which I found to be perfect for illuminating the product without causing overexposure.
Best Product Photography Setup Step 2
Step 4: Configuring the Camera
I used a Canon 5D Mark IV with a 24-70mm lens, a versatile choice that allows for both wide-angle and close-up shots. The camera settings were as follows:
- ISO: 200 – This low ISO setting ensures minimal noise and maximum image quality.
- Aperture: f/16 – A narrow aperture for a deep depth of field, ensuring the entire product is in sharp focus.
- Shutter Speed: 1/125 – This shutter speed helps eliminate any motion blur and syncs well with the flash duration.
Best Product Photography Setup Step 3
Step 5: Capturing the Image
With the setup in place and settings configured, I took several shots, adjusting the angle slightly to find the most flattering perspective. Here’s a breakdown of the key factors that contributed to the successful capture:
- Lighting Angle: The light angle was crucial in highlighting the product’s features without creating harsh shadows.
- Distance from Background: Keeping the product a foot away from the background helped maintain a clean look with soft shadows.
- Camera Settings: The combination of low ISO, narrow aperture, and moderate shutter speed ensured a sharp and well-exposed image.
Results and Analysis
The resulting image showed the Vaseline cream sharply in focus, with even lighting that highlighted its features without any harsh reflections or shadows. The white background and cube provided a professional and clean aesthetic, making the product stand out.

Best Product Photography Setup Final Result
Conclusion
Product photography is a critical aspect of presenting your products to potential customers. High-quality images can significantly impact purchasing decisions and enhance the overall perception of your brand. As demonstrated, even with a simple setup involving one light source, you can achieve outstanding results. The key lies in careful positioning of the product, thoughtful lighting placement, and precise camera settings.
By following this step-by-step guide, you can create professional product photos that highlight the best features of your items. Whether you are a small business owner or an aspiring photographer, mastering this basic setup will greatly enhance your product photography skills.
Call to Action
If you are looking for a product photography studio in London, contact Cineview Studios. We specialise in creating high-quality product photography like the one demonstrated in this guide. Our team of professionals is equipped to handle all your product photography needs, ensuring that your products look their best. Visit our website or call us today 020 8305 2849 to learn more about our services and book your session.
2 thoughts on “Best Product Photography Setup: A Step-by-Step Guide”